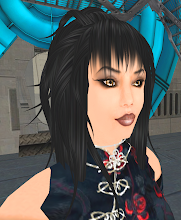
Ok, so start the Gimp, and create a new image. I usually start with 1024x1024 images, and then shrink them to 512 before uploading to Second Life, but you could start with 512x512 for this texture. Start with an image with a white background. I think any background color will work, but I always start with white.
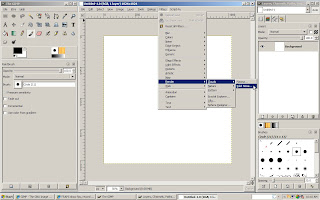
First, we're going to render some clouds. Yes, I said clouds. Go to the Filter menu, then Render . . . Clouds . . . Solid Noise. This is just a tool in the Gimp to produce a randomized gray scale pattern.
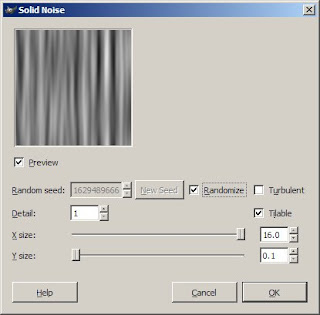
A new window will pop up with a bunch of options in it. Set the "X size" to the maximum value, 16, and the "Y size" to the minimum, 0.1. Also make sure the Randomize and Tileable boxes are checked. Don't check the Turbulent box, it won't look like fabric folds. This basically generates tall skinny clouds, I suppose, which conveniently look like fabric folds. Click the OK button.
You can just stop here and use this as is, if you want. But I wanted to add a bit of texture to fabric, and some color. I added texture using a technique I leaned here. First, create a new layer and fill it with gray (RGB (128,128,128) or 808080). Then go to Filters . . . Noise . . . Scatter RGB.
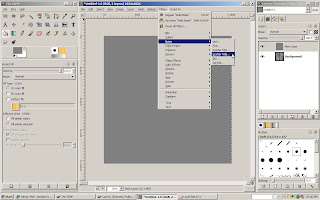
Again, you'll get a window with a bunch of options. Set them like this: 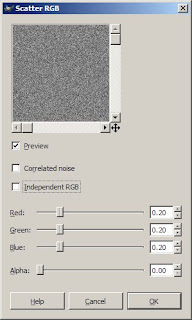
Click on Ok. Next go to Filters . . . Blur . . . Motion Blur.
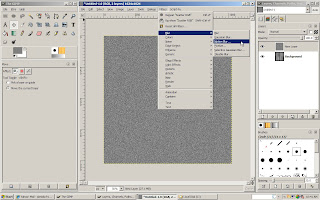

Click on Ok. Next go to Filters . . . Blur . . . Motion Blur.

And, another pop up. Set the options here like this:
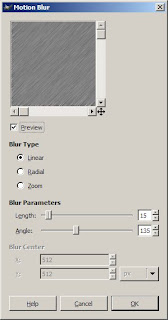
Click on Ok. Now, we're going to make this pattern follow the fabric folds we made earlier by displacing this layer. Go to Filters . . . Map . . . Displace. What this filter actually does, if you care, is shift the pixels left, right, up, and down depending on the gray scale value of another layer. This will make it look like the texture is folded the same way the fabric layer is.

Click on Ok. Now, we're going to make this pattern follow the fabric folds we made earlier by displacing this layer. Go to Filters . . . Map . . . Displace. What this filter actually does, if you care, is shift the pixels left, right, up, and down depending on the gray scale value of another layer. This will make it look like the texture is folded the same way the fabric layer is.
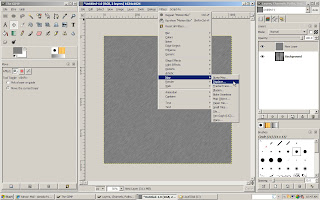
Anyway, you'll get another pop up to set options. Set them like this:
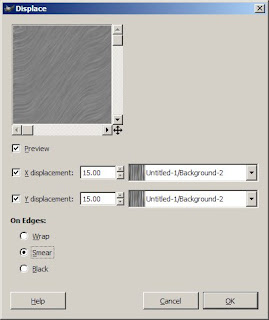
Make sure the layers selected in the drop downs is the original layer you made with the clouds filter (the fabric folds). Mine was called Background because I got lazy and didn't rename it something that made sense. Click on Ok. Next set the Mode for this layer to overlay. The texture we made is subtle, but it's there and adds some nice detail I think.
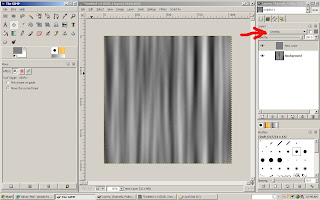
Ok, now we add some color. This is one of those things that can be done several different ways. It's a matter of preference, mostly, but I like to use the Colorize tool. Go to Layer . . . Colors . . . Colorize.
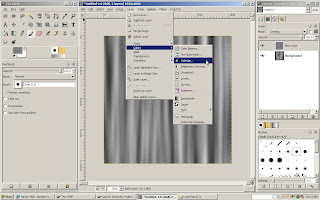
Another pop up, you know the drill by now.
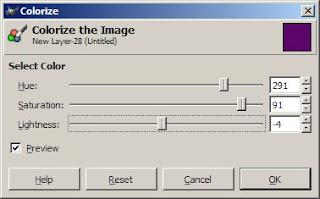
Play with these sliders to get whatever color you want. I have developed a bit of a scary liking for purple lately, so I moved the sliders around till I got a purple I liked. But go with whatever color you want. Click on ok, then merge the layers. I forgot to get a screenshot of this, but right click on the top layer in the Layers window, and select Merge Down. You should now have an image very much like the one at the start of this tutorial.
I uploaded this texture into Second Life and used it to make curtains! I kinda like them.


